
| |
Amiga Emulator FAQ |
Updated: 13/08/2022
1. How do I install FS-UAE and Launcher on the Macintosh?
Download FS-UAE Launcher and Fs-Arcade, extract the files and move them into Applications.
Alternatively, move the files into your home folder area.
2. How do I initially setup FS-Launcher to use the emulator?
a) First you will need to import the kickstart rom files. Copy the ROM files to your documents or where-ever and click on the icon saying that says 'Click to import Kickstart ROMS'.
You can browse for specific rom files, or import them from your AmigaForever CD, DVD or mounted ISO file. You can also import them via the FS-UAE menu (top left) and select
Import Kickstarts or Amiga Forever Import.
b) Select the Amiga Model you require e.g A500, A600, A1200 etc.
c) For Memory, set about of Chip RAM 512K - 2Mb (Chip ram is used for graphics and sound) and Fast RAM 512K - 8MB (used to run programs and data).
d) On the Floppy tab, select the ADF (Amiga Disk File) images to load, use DF0 for boot disk, and DF1 etc for additional disks.
e) Click Start to start the emulator.
Read the FS-UAE Getting Started guide on using this emulator.
3. How do I configure the emulator using Preferences windows?
There are 6 tabbed windows to configure uae for a specific Amiga model or configuration for specific games.
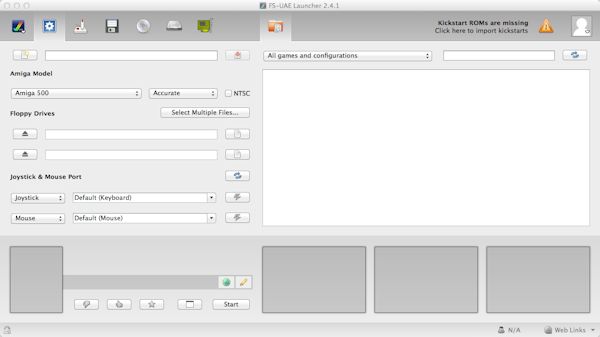
Home - This is the first and default tab where you can select the Amiga model, speed, initial floppy disks to load and mouse/joystick settings. See picture.
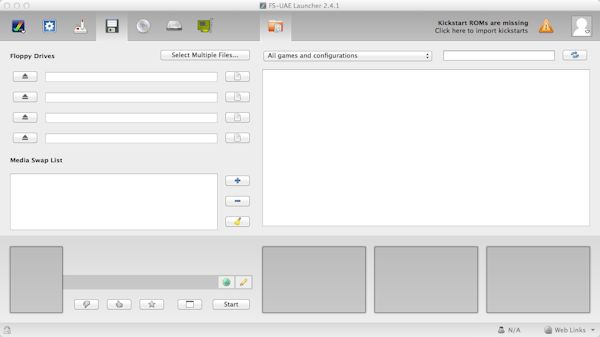
Floppy Drives: Here you can select your floppy disk images (ADF, ADZ, DMS etc) to load into each of the four floppy drives (DF0 to DF3) into the emulator. An eject button is on the left and selection buttons on the rights. If you need to swap between lots of floppy images use the Media Swap List below to make it faster. See picture.
CD-ROM Drive: Here you can select your CD-ROM disk images to load into each of the emulator. An eject button is on the left and selection buttons on the rights. If you need to swap between lots of disc images use the Media Swap List below to make it faster. See picture. See picture.
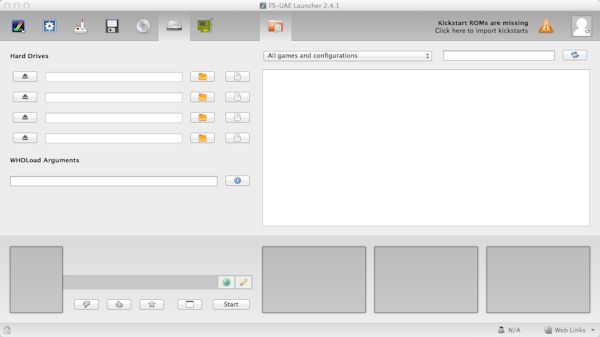
Hard Drives: Here you can select upto 4 hard disk images to load into the emulator. An eject button is on the left and selection buttons on the right for either a folder (for directory type drives) or for a file (HDF files). You can create new HDF files via the FS-UAE menu as select HDF Creator. See picture.
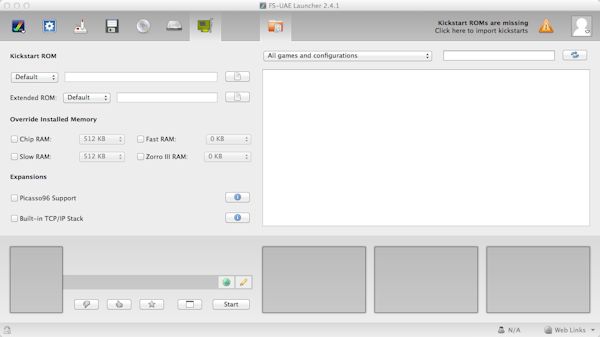
RAM & ROM - This is important configuration, you will need to specify the Kickstart ROM to use. Kickstarts can be dumped from a real amiga using the transrom utility provided or one supplied with the AmigaForever CDROM or download (Plus or Premium editions). Also, you can specify the amount of memory (RAM), there is Chip RAM for storing graphics and audio, Fast Ram for programs and data and other variants. See picture.
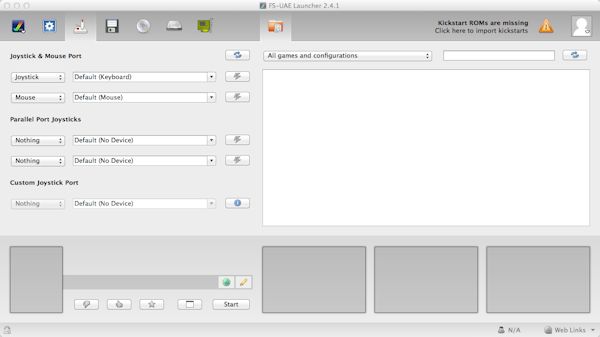
Input Options - Select what is plugged into the equivalent ports for external input. For example, the default for Joystick port is the keyboard and for the mouse port is the mouse.
If you have a real USB Joystick or Joypad installed, change it to that. Settings for Parallel Ports for Joysticks and Custom Joystick port can be set.
See picture.
Expansions - Select the expansion hardware to emulate including Accelerator board (faster 68k CPU or PPC CPU), Blizzard SCSI kit (external hard drives), Graphics card (Hires graphics), Sound card, Network card, and UAE bsdsocket library for Internet access.
See picture.
Configs and Games -Use this window to manage custom configurations you have saved. Also, you can set additional configuration such as CPU, JIT, Floppy drive speed, Drive volume, Freezer cartridge and Hardware dongle. See picture.
To accesss advanced settings, open the FS-UAE menu and select Settings.
At the bottom there are some toggle to switch between windowed and full screen modes.
At any point, click on the Start button to begin the emulator.
4. What are the Keyboard shortcuts?
Here are a list of useful keyboard shortcuts (they are displayed when FS-UAE is first loaded or press Cmd + E):
F12 = FS-Menu
Cmd + F = Toggle full screen mode
Cmd + Z or F11 = Cycle zoom modes.
Cmd + B = Toggle extra visible border.
Cmd + S or PrntScrn = Save a screenshot of current Amiga frame (see also Print Scn).
Cmd + Q or Cmd + F4 = Quit
Cmd + D = Debugger
Cmd + G = Toggle Mouse capture mode.
Cmd + K = Full keyboard emulation
Cmd + Up = Amiga cursor up when joytsick emulation is enabled.
Cmd + W = Warp mode (no frame limit, no audio) toggle.
Cmd + R = Soft Reset
Cmd + T = Hard Reset
Cmd + P = Pause emulation (see Pause/Break key)
Cmd + C = Activate cartridge.
F12 + M = Mutes the sound
F12 + A = Freeze button for Action Replay.
Cmd + comma = Decrease volume
Cmd + period = Increase volume
Cmd + M = mute or unmute FS-UAE sound
Cmd + N = mute or unmute floppy drive sounds
Cmd + F9 = toggle chipset/RTG display
Tab = toggle chat function
Ctrl + F10 = Toggle performance graphs and FPS display.
Cmd + Tab = Switch to another window.
5. How do I boot from a floppy disk image (ADF) to play a game or boot up into Workbench?
In FS-UAE, click on Floppy Drive tab, select the first floppy drive (DF0) and click on Browse for file icon , then select the ADF file from your hard disk. Click OK. Click on Start to launch the emulator and run the game or Workbench.
To create a blank floppy, for example to same files or game positions on, use the FS-UAE menu and select ADF Creator.
6. How do I create a hard disk to install Workbench on it?
In FS-UAE you can specify a folder (or directory) to store your Amiga files in and use the Hard Drives preferences to select this folder.
Also, you can create HDF (Hard Disk Files)to store hard disks for the Amiga. See FS-UAE to create a new HDF file, see HDF Creator.
To install Workbench insert a Workbench or Install disk in DF0 under Floppies and click Start. See instructions here for installing Workbench.
FS-UAE supports PPC emulation, so you can install AmigaOS 4.1 FE using these instructions.
If you have a question about FS-UAE or Amiga related, then please
Visitor:
Back to UAE FAQ.