
| |
Amiga Emulator FAQ |
Updated: 8 April 2026
1. Load Winuae, on Quickstart tab select A1200 or A4000 for the Model and and then the Hard disk tab.
2. Select Add Hardfile and create a new Hardfile. Enter the size in megabytes, for example, 200 for 200MB and click Create.
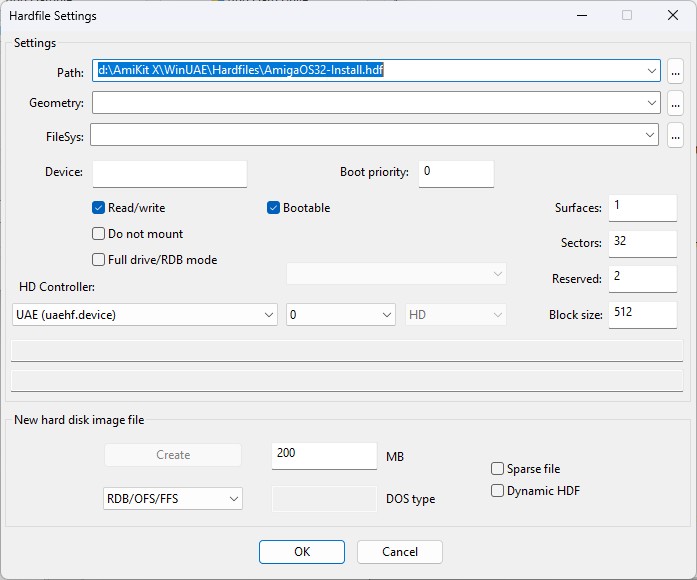
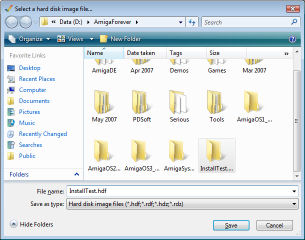
3. Select a location on your hard disk, and enter a filename and click Save. Click OK when done.
4. In Windows Explorer or use an unarchiver tool like 7-Zip to open the AmigaOS 3.2 ISO file, and open the ADF folder to find the
disks which you need to boot into AmigaOS to install it. Extract all the adf files to a folder on your harddrive.
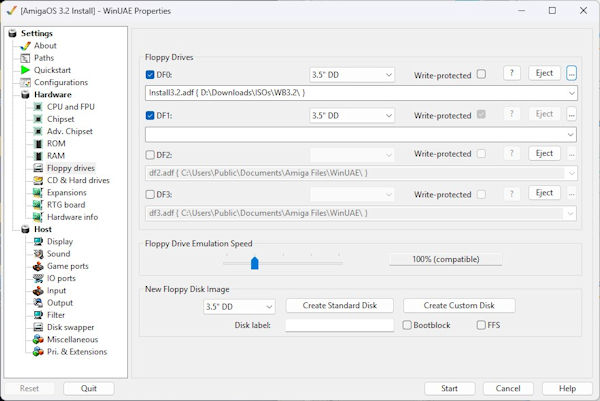
Insert Install3.2.adf in DF0: on the Floppy drives window
in WinUAE.
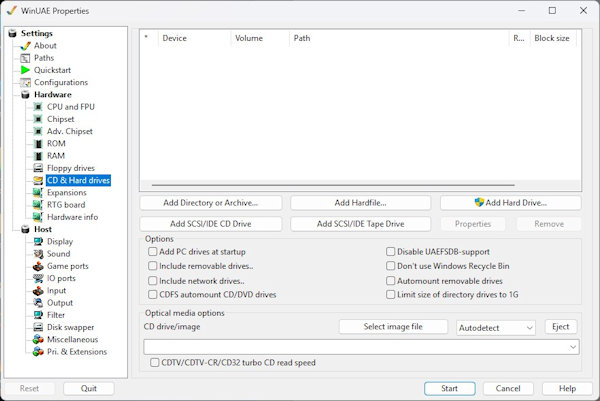
On CD & Hard drives, click Add Directory again and add an entry for the entire
CDROM. Device is CD1, Volume name is AmigaOS3.2 and path is Y: (or
whatever your CDROM drive is called). Click Start.
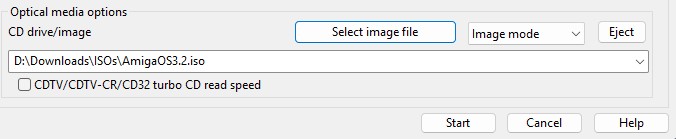
To use an ISO file, use the CD drive/image option at the botton of the CD & Hard drives configuration. Then click Start.
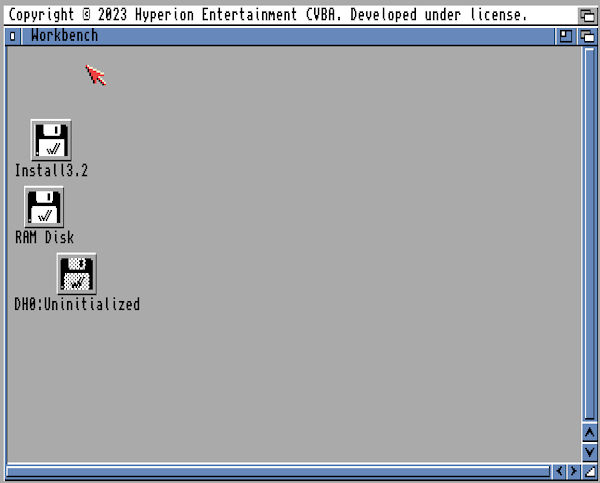
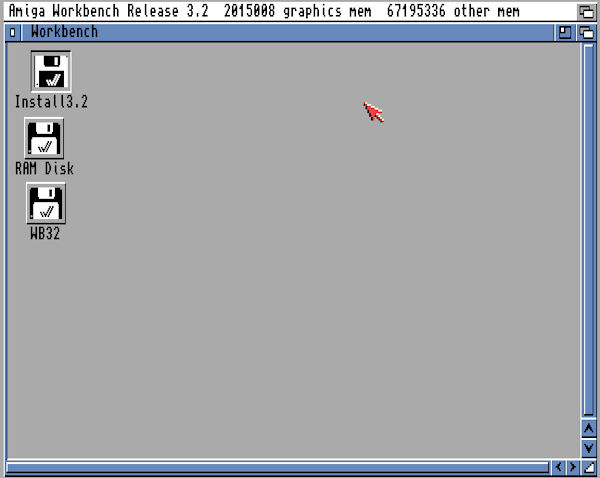
5. You may have to move some windows about to see Workbench. You should now have Workbench loaded with icons for Install3.2, Ram Disk, and a extra disk called DH0:Uninitialised.
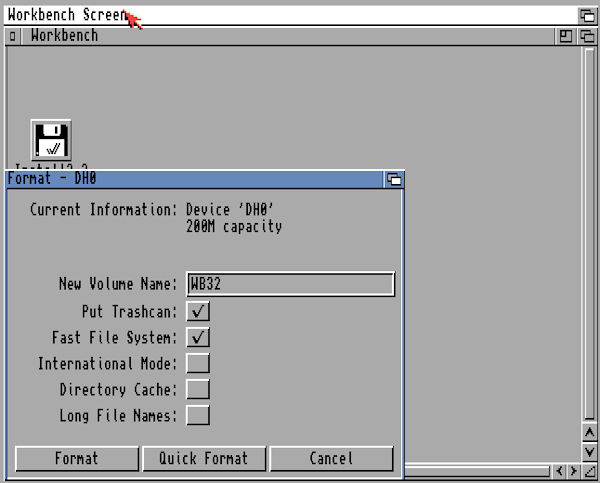
6. Select the DH0:Uninitialised icon and goto the menu
and select Icons, Format Disk... Enter a Volume name and tick Fast File System,
so it uses the
best file system for hard disks. Click Quick Format as a full format
is not required here.
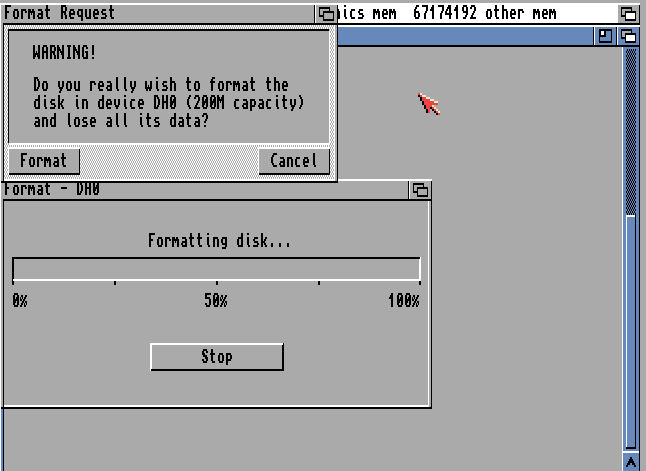
7. Click Format for continue formatting.
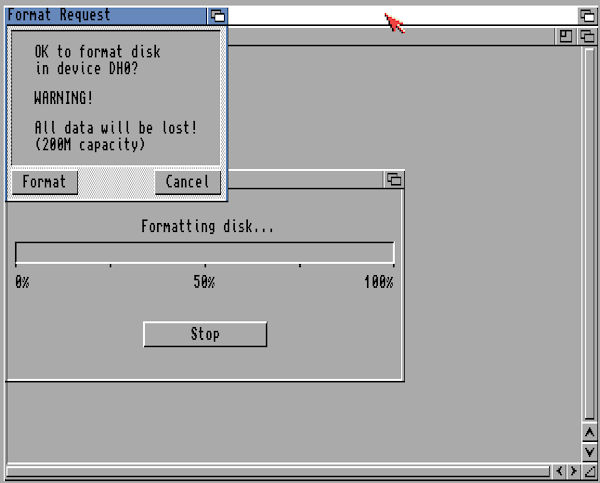
8. Click Fomat again on the second Warning message.
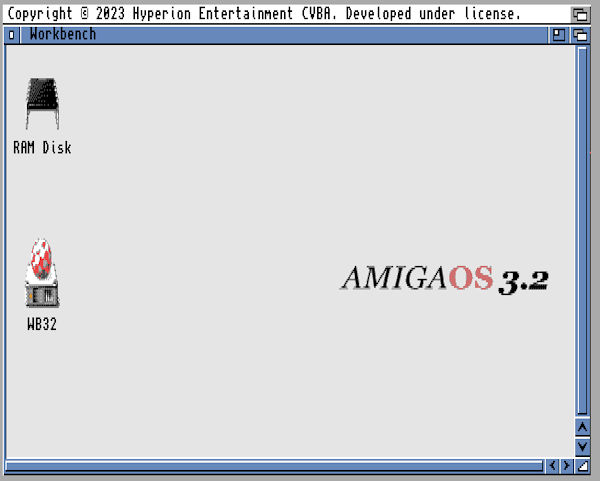
9. You should now have a hard disk called WB32 on the Workbench. You are ready to install Workbench.
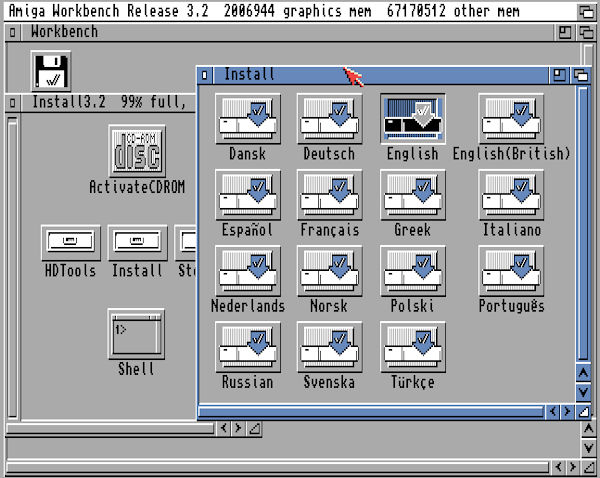
10. Double click on InstallOS3.2 disk icon and double click on Install folder and select the English installation script.
11. Before installing AmigaOS 3.2, make sure you meet the requirements: 6MB of Fast RAM, 68020 (68040 is better) CPU, and Kickstart 3.1 ROM and Sound is enabled otherwise installation will fail for one reason or another. Press F12 to check settings, press Reset if necessary before continuing.
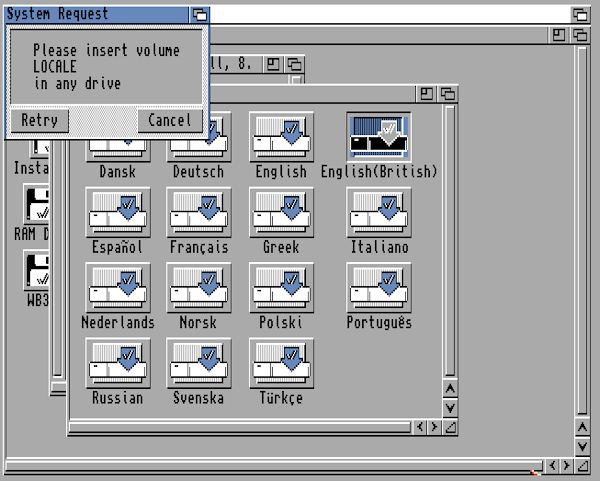
Insert Locale disk for 3.2. Press F12, select Floppies and insert the Locale disk in DF1:.
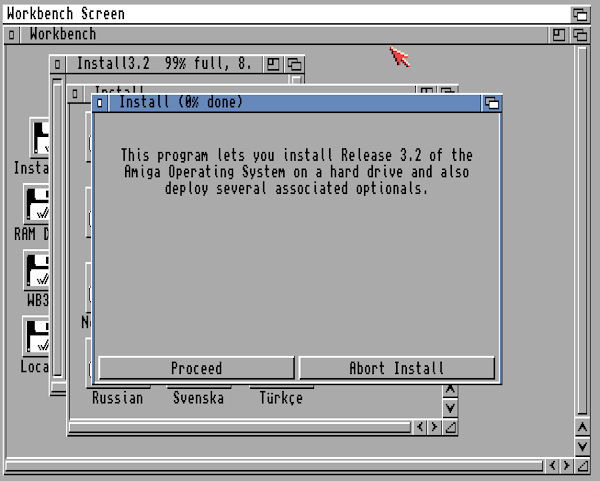
12. Read the message and then click Proceed.
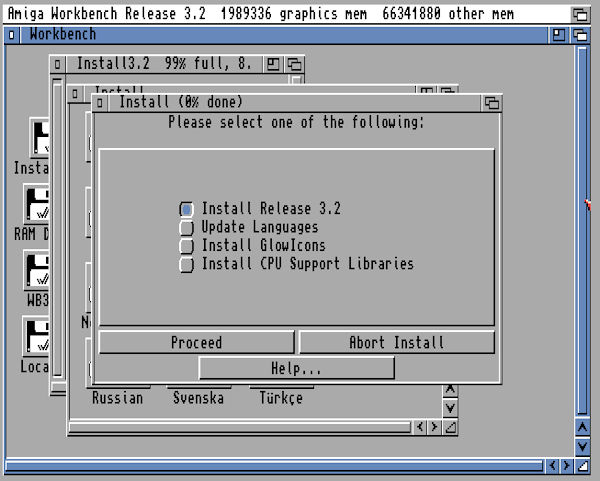
13. Select Install Release 3.2 and click Proceed.
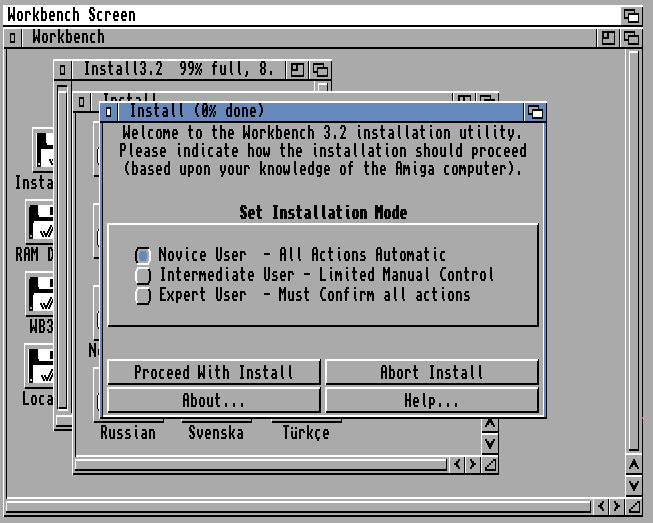
14. Select user level and click Proceed with Install. Default is Novice user.
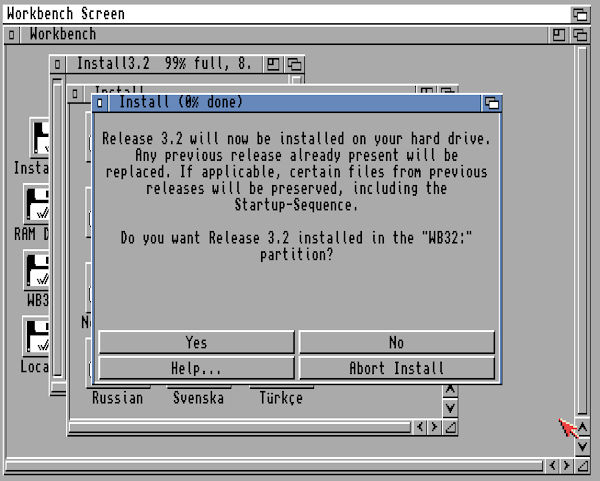
15. Check that the correct hard drive is selected e.g. WB32: and then click Yes to proceed. Select No to change drive.
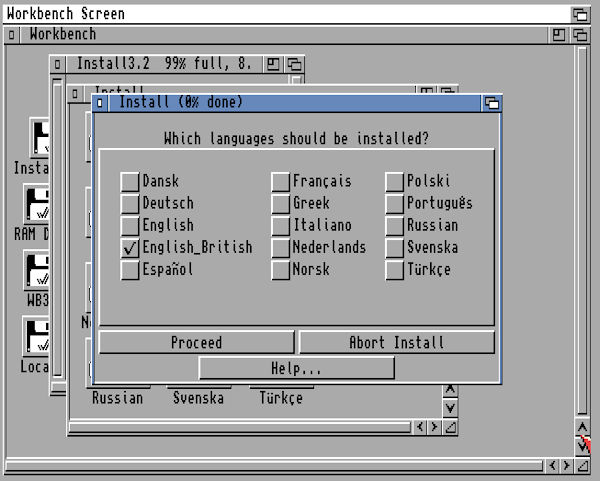
16. Select the language to use, in this case English (British), and click Proceed.
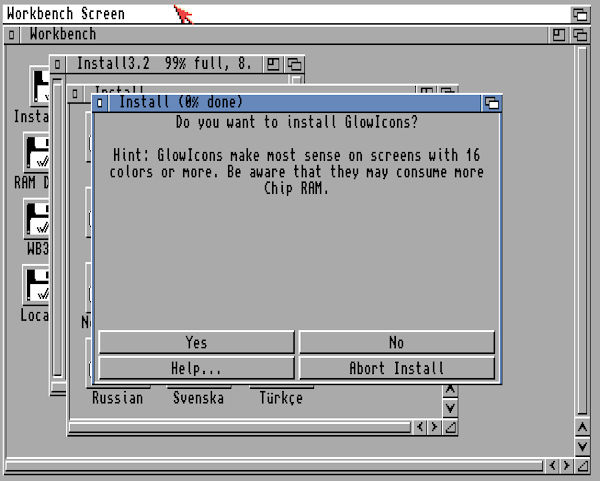
17. Select whether Glow icons are to installed. Click Yes or No.
18. Various files are now copied to the Hard drive.

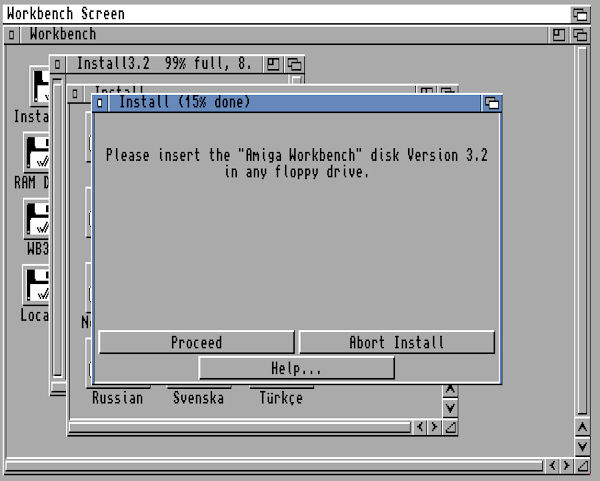
19. Insert the Amiga Workbench disk. Press F12 and replace Locale disk with Worbench disk. Click Ok, it will auto-continue installation.
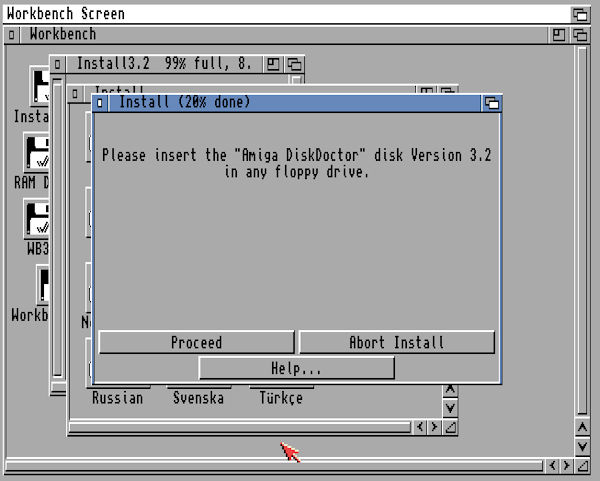
20. Insert Amiga DiskDoctor and then any other disks when prompted until installation is complete.
21. Read notice about CPU libraries to install. Click Proceed.

22. Installation is complete.
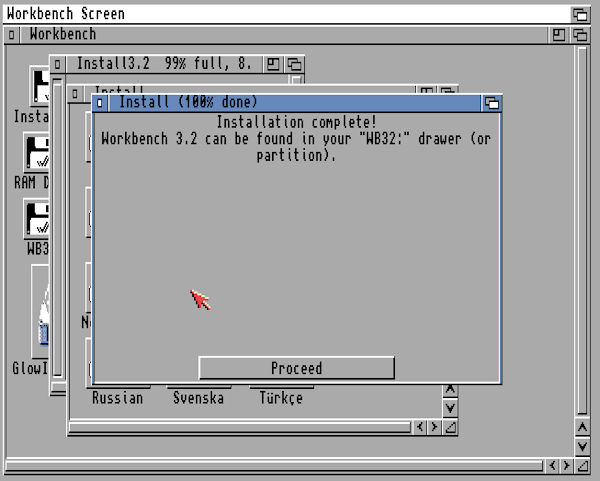
23. Press F12, eject any disks in Floppy Drives and remove the Boot entry from Hard drives and select Reset. Your Workbench 3.2 installation is ready to use!
24. To improve the display, open AmigaOS3.9, Contribution and open Picasso96Install folder and run Setup. Make sure you have set up some RTG RAM and use a decent CPU e.g. 68040, it will use the uaegfx graphics driver so it will use your PC's graphics card instead of the slower native modes. Reset the Amiga and run the ScreenMode program from the Prefs folder and select uaegfx and a screen resolution to get something like this:
25. Additional programs can be installed such as Internet software,
PowerPC support, CD ROM drivers and other software from the Contribution folder.
Internet software including AmigaMail and AWeb browser.
a) Web Browser: NetSurf , OWB, IBrowse.
b) Text Editor: Cygnus Ed , StormC5 Ed
c) Multimedia: Hollywood
d) Desktop Publishing: PageStream
e) Graphics: Personal Paint or PPaint, or ArtEffect 4
f) Word Processor: AmigaWriter.
g) Development: AmiBlitz3, VBCC, ACE, SDL, NDK 3.2R2 , Storm C 4
h) User Interfaces: MUI 5, Dopus 5
i) Games on Aminet, Hyperion Entertainment.
![]() Back to UAE FAQ.
Back to UAE FAQ.