DNS

Network Guide

How to setup and use Domain Name Service

For any network, users need to access resources on their network such as access files on file shares, print to printers and browse the web. Using IP addresses to access them would not be very user friendly, so, we apply names to IP addresses and users can then use names to access their resources. This is what a DNS service is for. DNS works like a tree, starting from root level, you have top level domain (TLD), which end with common names such as com, org, net, uk, gov, edu these names are provided by TLD name servers or root DNS servers run by Internet Assigned Numbers Authority. Next level is the Second Level Domain, which are usually countries around the world. Then you have the organisation, company or site names and then specify server or web sites. Eg.

Domain name
www microsoft com .
Site name Company name TLD root

Note that the root is not usually displayed but, by default it is at the end of the dns name.

Contents of a DNS Domain

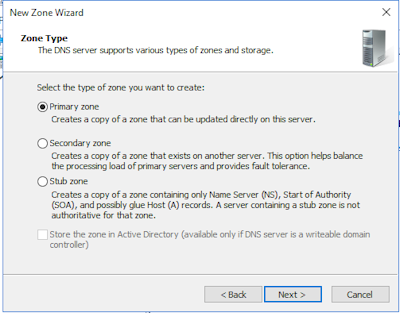
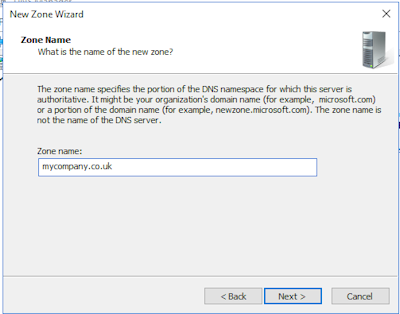
A DNS server is a database zones and each zone has records which are queried by other computers. A zone file is basically a top level domain which a company or organisation is resposible for, for example, Microsoft Corp is responsilbe for microsoft.com domain. A forward lookup zone contains a list of names and their equivalent IP addresses, a reverse lookup zone is the opposite, a list of IP addresses with the equivalent name.

DNS contains various records queiried by other computers that return the IP address of the domain name (A or host record), or vice versa, the domain name for an IP address (a reverse PTR record), it can also do aliases (CNAME records), service record for special services (SRV), Mail exchange records (MX) for looking up e-mail servers, start of authority (SOA) records, name server records (NS) and so on. For a complete list see DNS record types.

Setting up DNS on a Windows Server

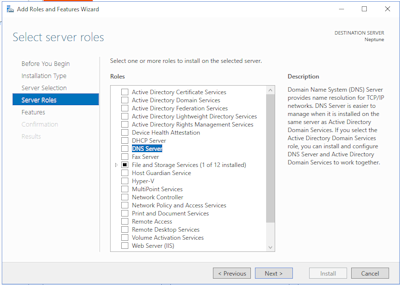
Windows Servers has the DNS role which can be installed via Server Manager,

  1. Open Server Manager, select Add Roles and Features.
  2. Select Role-based or feature-based installation. Next.
  3. Select server and then next.
  4. Tick DNS Server.

    Install DNS

  5. Add required features.
  6. If you get a validation warning, then you will need to configure a static DNS address in Network settings.
  7. Click Next a few times and then Install.
  8. Click Close.
  9. Click on 'Local Server' and the Ethernet IPv4 link.
    1. Open properties of Ethernet connection.
    2. Open properties of TCP/IPv4 item.
    3. Enter IP address, subnet mask, default gateway, DNS server.
  10. On the Tools menu, select DNS console.
    1. Expand server name, Forward Lookup Zones.
    2. Right click and select New Zone.
    3. Select Primary Zone.

      Primary zone type

    4. Enter a zone name e.g mycompany.co.uk.


    5. Create a file with the zone name e.g. mycompany.co.uk.dns.
    6. Select Dynamic update option. By default, 'do not allow dynamic updates' is selected. If you want PCs and servers to
      auto register themselves, then select 'Allow both nonsecure and secure dynamic updates'.
    7. Click Finish
    8. Two records are added: SOA (Start of authority) and NS (name server).
  11. Also, I would recommend a Reverse lookup zone for the IP sunbet(s) you are using.
  12. You can now start using your DNS server.

Setting up DNS on Linux system

Other common DNS service is called Bind and it is used on many Unix, Linux or Mac systems. Setup is different depending on the Linux or Unix distribution.
For Mint Linuxthe following procedure could be used:

  1. Login to the server with user with administrator privileges (e.g. sudo).
  2. Install the package using whatever method suitable.
    1. A package manager.
    2. Enter apt-get update; apt-get install bind9 (see debian or ubuntu)
    3. Enter yum update ;yum install bind bind-utils (see Centos)
  3. Configuration files can be found in /etc/bind9.
    1. Named.conf - The main configuration file consisting of options, local and default-zones.
    2. Named.conf.options - configure whether caching or authoritative server and zones.
    3. Named.conf.local - local server options.
    4. db.filename - Various forward lookup zone files (empty, local, root).
    5. db.number - Reverse lookup zone files (0, 127, 255).
  4. Copy db.empty to another file, e.g. db.mycompany, and use that for your DNS records.
  5. Once configuration is done, restart the service e.g. systemctl restart bind9.
  6. Check configuration using named-checkconf tool.
  7. If any changes are made use the rndc tool to reload the zone data into memory.
  8. Use nslookup or dig tools to check query lookups of DNS.

Example, of empty zone file with TTL (time to live), SOA (start of authority) and NS (name server) start records.

$TTL	86400
 @	IN 	SOA 	localhost. 	root.localhost. (
 	1 			; Serial
 	604800 		; Refresh
 	86400 		; Retry
 	2419200 	; Expire
 	86400 ) 	; Negative cache TTL
 ;
 @ IN 	NS 	localhost.