|
Amiga Emulator FAQ |
Workbench 2.0 Preferences
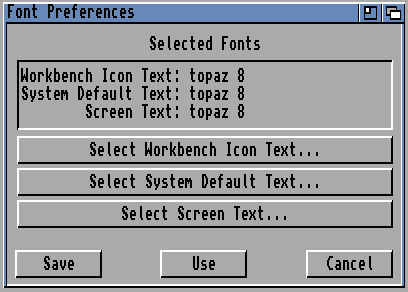
- 1. Font
- Sets the font for Workbench icons, system default and screen text.
- Large proportional fonts should be avoided.
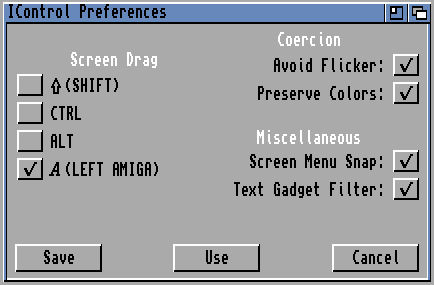
- 2. IControl
- Sets the Intution functions for moving screens and function.
- Screen Drag: Use Left mouse button and a qualifer (left Amiga key) to move the screen
- Coercion: Set 'Avoid flicker' and 'Preserve colors' settings
- Misc: Set 'Screen menu snap' and 'Text gadget filter' settings.
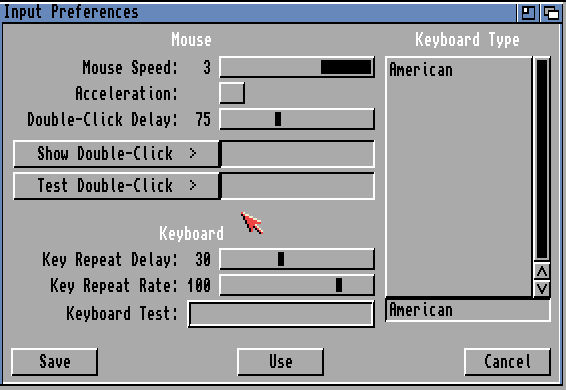
- 3. Input
- Mouse Speed: Set speed of mouse (1-3)
- Acceleration: Set even fast mouse movement.
- Double-Click Delay: Set time between clicks for double click on left mouse button
- Show Double-Click: Display white bar when double-clicked.
- Test Double-Click: Display message when button double-clicked.
- Key repeat delay: Sets the time between first key press and when the same key is repeated.
- Key repeat rate: Sets how fast the character is repeated.
- Keyboard: Press keys here to test key repeat settings.
- Keyboard type: Set character set for keyboard (copy keymaps from Extras disk for more keymaps).
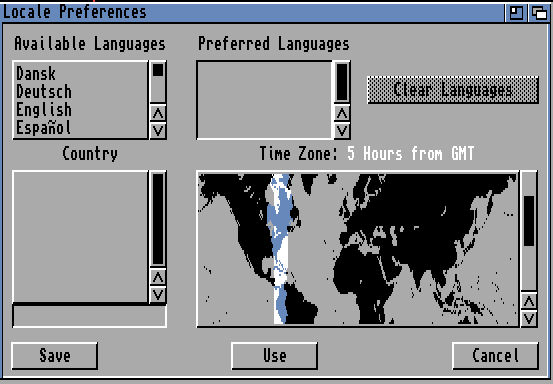
- 4. Locale
- Available Languages: Select language for text to use for Workbench.
- Preferred Languages: Selected languages are list here.
- Country: Select preferred country for localized settings.
- Time Zone: Select one of 24 time zones on map for time.
- NB: See Locale disk for more country and languages to use.
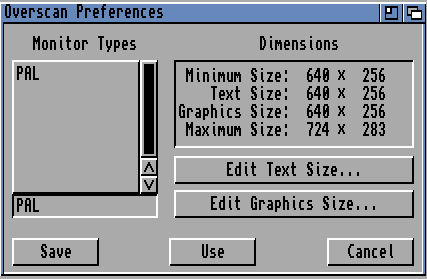
- 5. Overscan
- Monitor Type: Type of monitor to use e.g PAL, NTSC etc.
- Dimensions: Indicates minimum and maximum possible overscan size of screen for text and graphics.
- Edit text size: Change screen size for text.
- Edit graphics size: Change screen size for graphics.
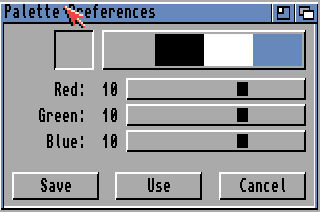
- 6. Palette
- Change the Red, Green, Blue colours for Workbench. Select a colour from colour block and use the RGB
color sliders to change the values (0-15).
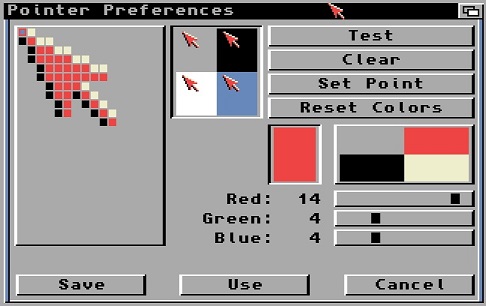
- 7. Pointer
- Pointer image. You can change the shape of the pointer by setting or clearing pixels
- Test. Apply changes to actual pointer to test the new image and colors used.
- Clear. Clears the entire pointer image.
- Set Point. Allows you to set the click pointer location indicated by small orange squire (usually top left of image).
- Reset Colors. Restores colour setting back to default.
- Colours. You can set the colours used for pointer using Red, Green, Blue sliders.
- 8. Printer
- Printer type. Select printer driver from the list. More drivers available on the Storage disk and on Aminet.
- Printer port. Printer can be connected via parallel port or serial port.
- Pitch. Sets the size in point size of the text in dots per inch.
- Spacing. Sets how many lines per inch on each page of paper.
- Quality. Sets the quality of printed output, draft will be faster, useful for just test and Letter for slower high quality output.
- Paper type. Set the type of paper to either Fanfold used by Dot Matrix or line printers or Single for daisy wheel, inkjet or laser printers.
- Paper format. Select the standard paper size you require which determine the width and length of the paper.
- Length. Set the number of lines per sheet of paper.
- Left margin. Sets left margin width in characters.
- Right margin. Sets right margin width in characters.

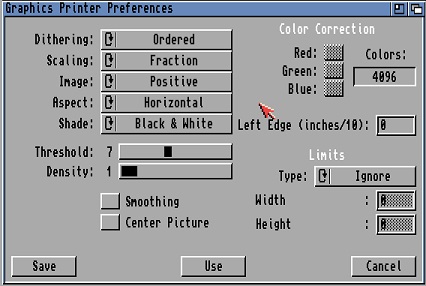
- 9. PrinterGfx
- Dithering. Selects type of dithering used between pixels: Ordered, Half-Time or Floyd-Steinberg (F-S).
- Scaling. Set the scaling of the image by Fraction or Integer type.
- Image. Sets the image or normal positive or reverse colours (negative).
- Aspect. Sets whether print is sent horizontally (landscape) or vertically (portrait).
- Shade. Sets type of colour or not is used: Black and White, Grayscale 1 or 2 or Color mode.
- Threshold. Sets the threshold between light and dark colours for graphic output.
- Density. Sets the amount of Dots Per Inch (DPI) for the image to improve resolution.
- Color Correction. Change Red Green Blue colours to increase or decrease the number of colours available.
- Left edge. Sets width of left edge in inches/10.
- Limits. Set the kind of limit setting to use: Ignore, bounded, absolute, pixels or multiply.
- Width limit. Set limits of width of paper in various sizes, if Limits not ignored.
- Height limit. Set limits of height of paper in various sizes, if Limits not ignored.
- Smoothing. Enabled smoother output to improve sharpness of the image.
- Center Picture. Enables centering of the image.
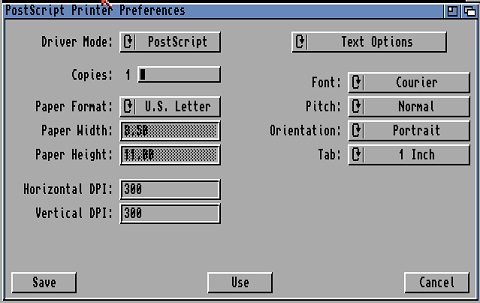
- 10. PrinterPS
- Driver Mode. Set to PostScript or Pass Through.
- Copies. Number of copies of prints to send to printer.
- Paper format. Select the standard paper size you require which determine the width and length of the paper.
- Paper width. Width in inches.
- Paper height. Height in inches.
- Horizontal DPI. Quality of image in Dots per inch.
- Vertical DPI.Quality of image in Dots per inch.
- Text options. Set font, pitch, orentation and tab width.
- Text dimensions. Set margins, font size, line leading, and lines per inch and page.
- Graphics options. Set edge size, width, height, image, shading, dithering and tranparent settings.
- Graphics scaling. Set aspect, scaling type and math and centering with sample scalings.
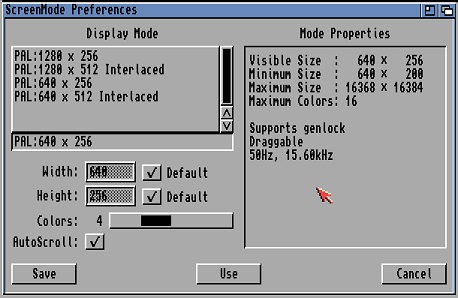
- 11. ScreenMode
- Display Mode. Select monitor type, resolution.
- Width. Width of screen in pixels.
- Height. Height of screen in pixels.
- Colors: Number of colours (2-16)
- Autoscroll. Scrolled enabled.
- Mode properties. Current settings shown here.
- NB: To improve graphics, use RTG using Picasso96 or CyberGraphX drivers.
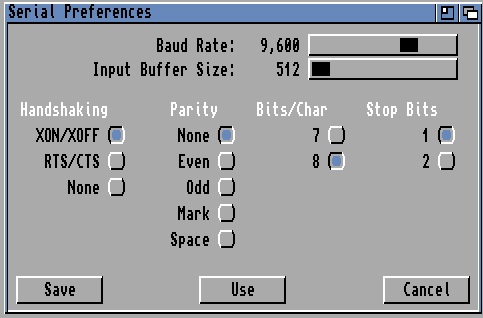
- 12. Serial
- Baud rate. Set the number of symbols or modulation rate per second sent over a serial connection.
- Input Buffer Size. The amount of memory to temporarily store data while is is being transmitted or received over serial connection.
- Handshaking.
- The methods of how different computers communicate together.
- Parity. How data is verified by using parity checks which can be Even, Odd or None.
- Bits
/ Char. Data is read in bytes (8 x 1s or 0s), you can set the number of bits used for data.
- Stop Bits. Number of bits to indicate then end of data (stop data).
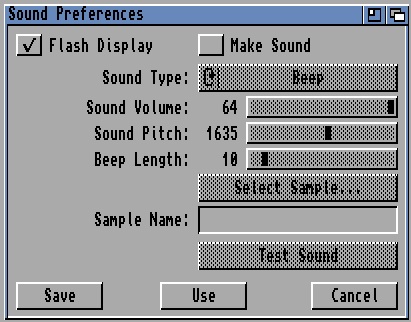
- 13. Sound
- Flash Display. Flashes the display when intuition tries to flash screen. Equivalent to a beep.
- Make Sound. Also make a sound when flashing screen.
- Sound type. Set type of sound: Beep or Sampled Sound.
- Sound Volume. Set volume of sound (0-64)
- Sound pitch. Set pitch of sound (1-3000)
- Beep length. Length of beep (1-100)
- Select Sample. Filename of sampled sound (IFF file only).
- Test Sound. Play the beep or sampled sound.
- NB: To improve sound, and not use the Paula chip, use AHI drivers with a sound card.
- 14. Time
- Year. Enter year here.
- Month. Select month here.
- Date. Select day of month.
- Hours. Select hour of the day.
- Minutes. Select the minutes.
- NB: If the Amiga has a battey backed clock then the date and time is remembered otherwise
it has to be set on every boot.

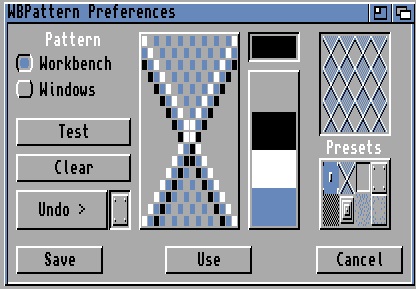
- 15. WBPattern
- Pattern. Select whether pattern applies to Workbench or on windows.
- Test. Test the pattern on Workbench or window.
- Clear. Remove pattern and set to appropiate colour.
- Undo. Discard the last change.
- Pattern. Selected single pattern shown here
- Colours. Colours shown.
- Pattern sample. Tiled pattern or colour shown here.
- Presets. Choice of patterns to use.
- x